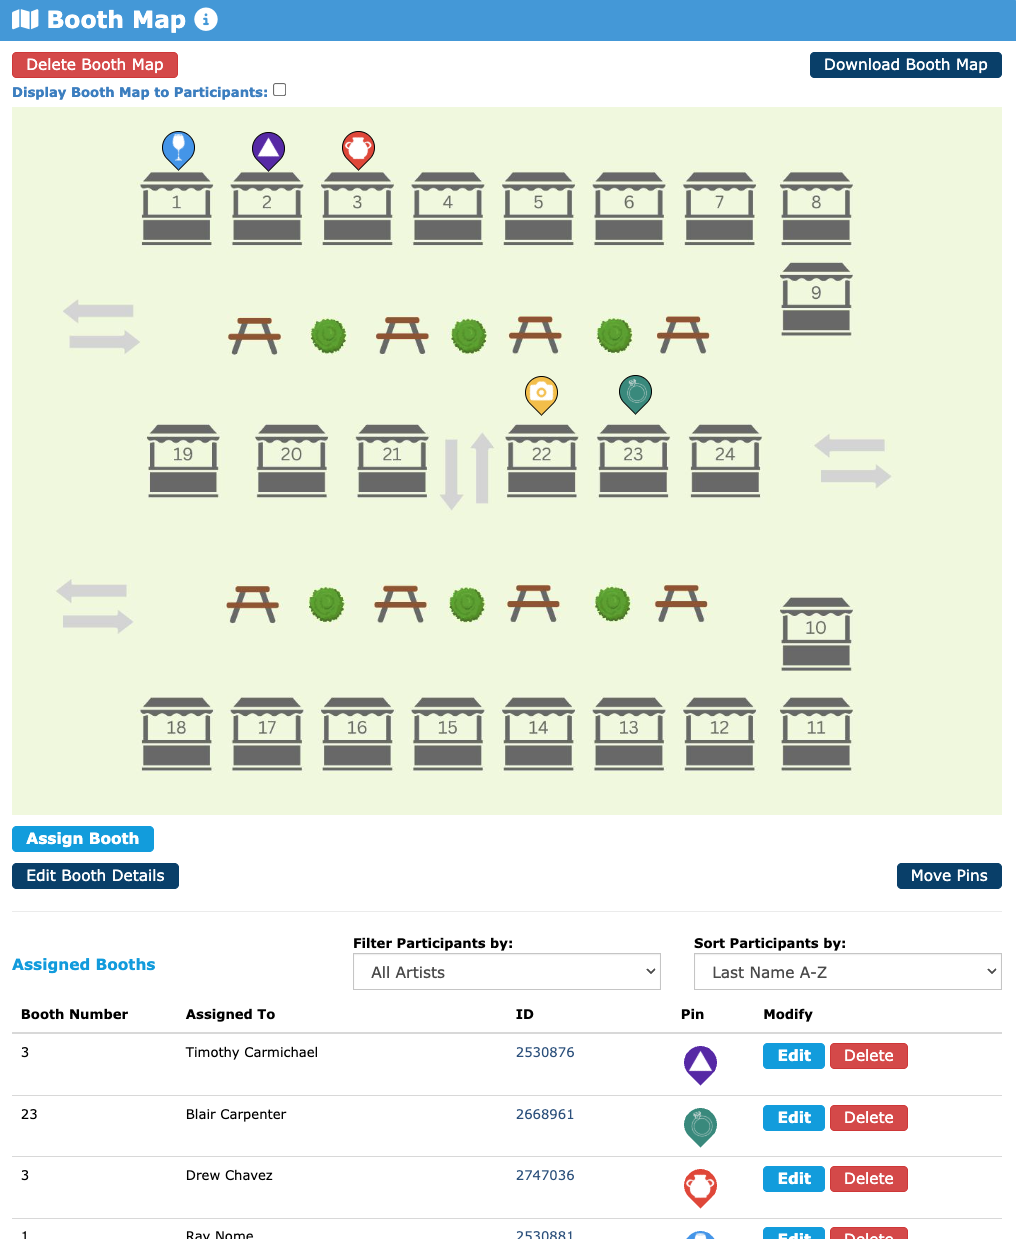
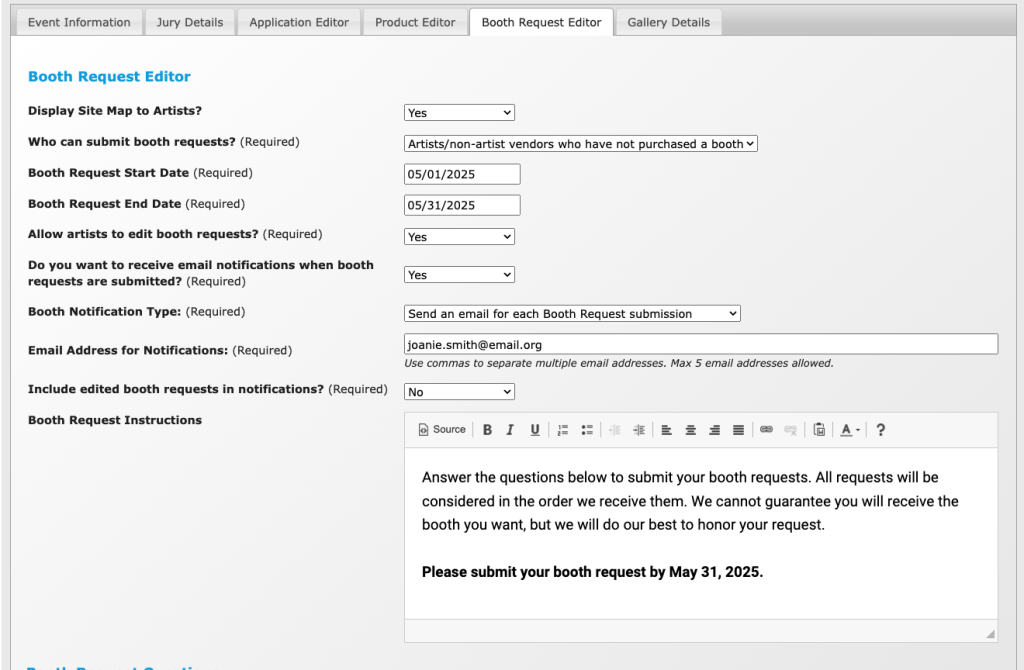
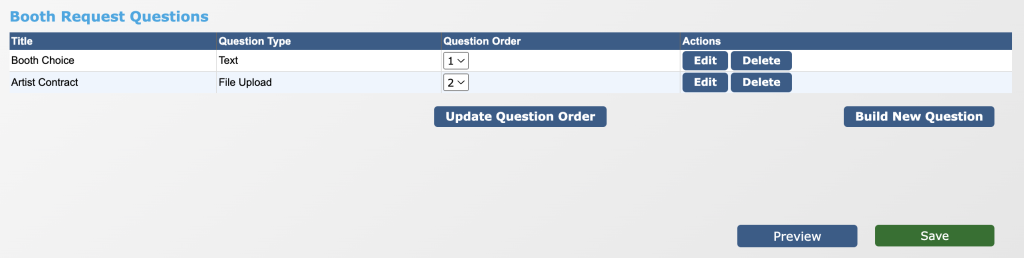
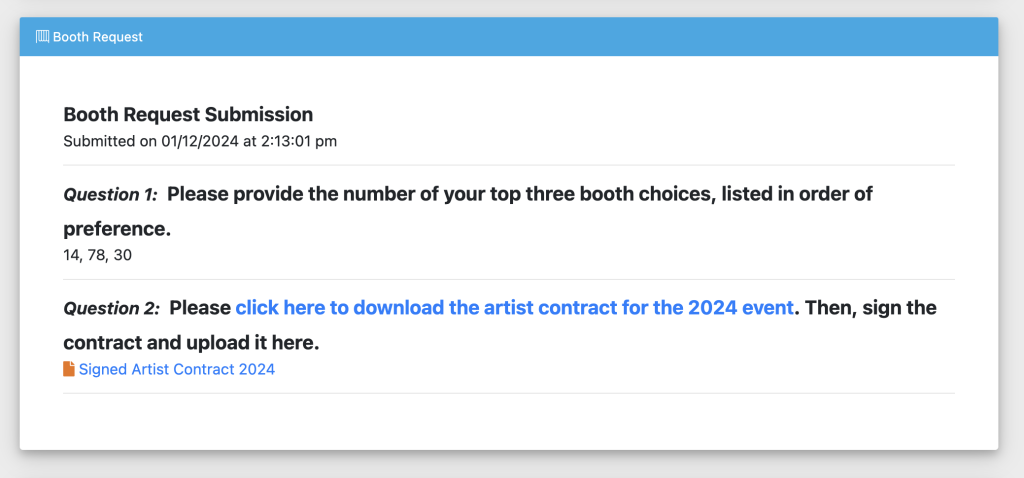
BOOTH MAP: MANAGE YOUR BOOTH ASSIGNMENTS IN ZAPP

Organize
Once your jury is finished, you’ll determine the artists and vendors who are invited to participate. But how do you keep it organized? With the Booth Management tool, you can upload your own booth map and update it with all of the applicant details stored in ZAPP.

Assign
Using the dynamic booth map, administrators can assign booths and view updates in real time. You have full control over your map—customize pins, assign booth numbers, and organize the assignments.

Display
At any point in the assignment process, you can display the booth map to the public with a unique link. Share it with your artists and vendors to help them spread the word about the event. Booth assignments will also appear on your embedded gallery to further help with your marketing efforts.

Sign up!
Complete the ZAPP Add On form to add your name to the waitlist and gain access to this feature.

HOW TO USE THE BOOTH MAP FEATURE

Step 1: Upload Your Site Map

Once the booth management feature has been activated by the ZAPP team, the first step is to upload your site map. 

  • Go to Events in the main menu and select Booth Management
  • Select your event from the Current Events dropdown menu.
  • Click Upload Booth Map and select the image of your site map.

Note: Site map files must be a JPG, JPEG, TIFF, or PNG file and no larger than 10 MB.

Step 2: Assign Your Booths

After uploading your site map, you can begin assigning booths.

  1. Click Assign Booth, then click on the location of the booth you wish to assign.
  2. A window will appear with options for entering the booth number, selecting the participant, and customizing the pin.
  3. Enter the booth number using a combination of numbers and/or letters. There are few ways you can customize your booth numbers:
    1. Artist or Vendor Medium/Type: Abbreviate the artist’s medium or vendor type to organize your event in sections, or spread different medium types throughout the event site (e.g. CM for ceramics).
    2. Location: If your event takes place on multiple streets or has distinct sections, include that information in the booth number (e.g. NW for northwest, ELM for booths on Elm street, etc).
    3. Booth Size: If your event has booths of differing sizes, indicate that in your booth assignment (e.g. SM for a small booth).
    4. No matter how you choose to create your booth numbers, make sure the numbers are consistent. This will help you, the artists, and patrons read the map quickly and easily. 
    5. Example Booth Number: ELMSM1 = Small Booth #1 on Elm Street.
  4. Filter the list of artists and select the artist or vendor assigned to that booth. 
    • Filter the list of artists by medium and/or status.
    • Sort the artist list by last name, booth payment date, status, or medium.
    • Click on the artist name to highlight your choice.
  5. Select a Pin Style, Size, and Color to customize the pin and keep organized as you assign booths.
  6. Click Save Pin to place the pin on your map. The booth number will update on the artist’s application and event management table.

Note: Clicking the Close button will close the window without adding your pin to the map or saving any changes you may have made.

Step 3: Manage Assignments

Once you’ve assigned your pins, you may need to go back and alter the details or location of a booth assignment. 

  • Click on a pin to pull up the details of the booth assignment.
    • Click Edit to change the details of the pin. 
  • View the list of pins beneath the booth map. 
    • Filter the list by status, medium category, pin color, and/or pin style. 
    • Sort the list by artist last name, booth payment date, status, medium, or booth number.
  • Click the ID Number to view the artist’s application. 
  • Click Edit to change the details of the pin. 
  • Click Delete to delete the pin from the booth map. 
  • To move a pin, delete the pin and replace it with a new pin and booth assignment in the new location on the map.

Step 4: Edit Booth Details

You can determine the information that will display on the public booth map. The booth number, artist name, and medium category will already appear on the map.

  1. Click Edit Booth Details.
  2. Choose Show or Hide underneath the Business or Studio Name, State, and Website options. 
  3. Click Save to update the booth details.

Step 5: Publicly Display the Booth Map

You can share your booth map with your fellow administrators, artists, patrons, or whoever you want to to give access to the booth assignments. 

  1. Click the checkbox next to the Display Booth Map to Participants option at the top of the map.
  2. Once you’ve checked the box, the View Public Booth Map option will appear. Click on this link to open the public version of the booth map. 
  3. Copy and paste this URL to share the booth map wherever you’d like.
screen capture of the map being made public

Step 6: Download the Booth Map

Download a PDF file of the booth map to save a copy for your records or share with patrons.

  1. Click Download Booth Map. 
  2. The Booth Map PDF will generate and download directly to your computer.