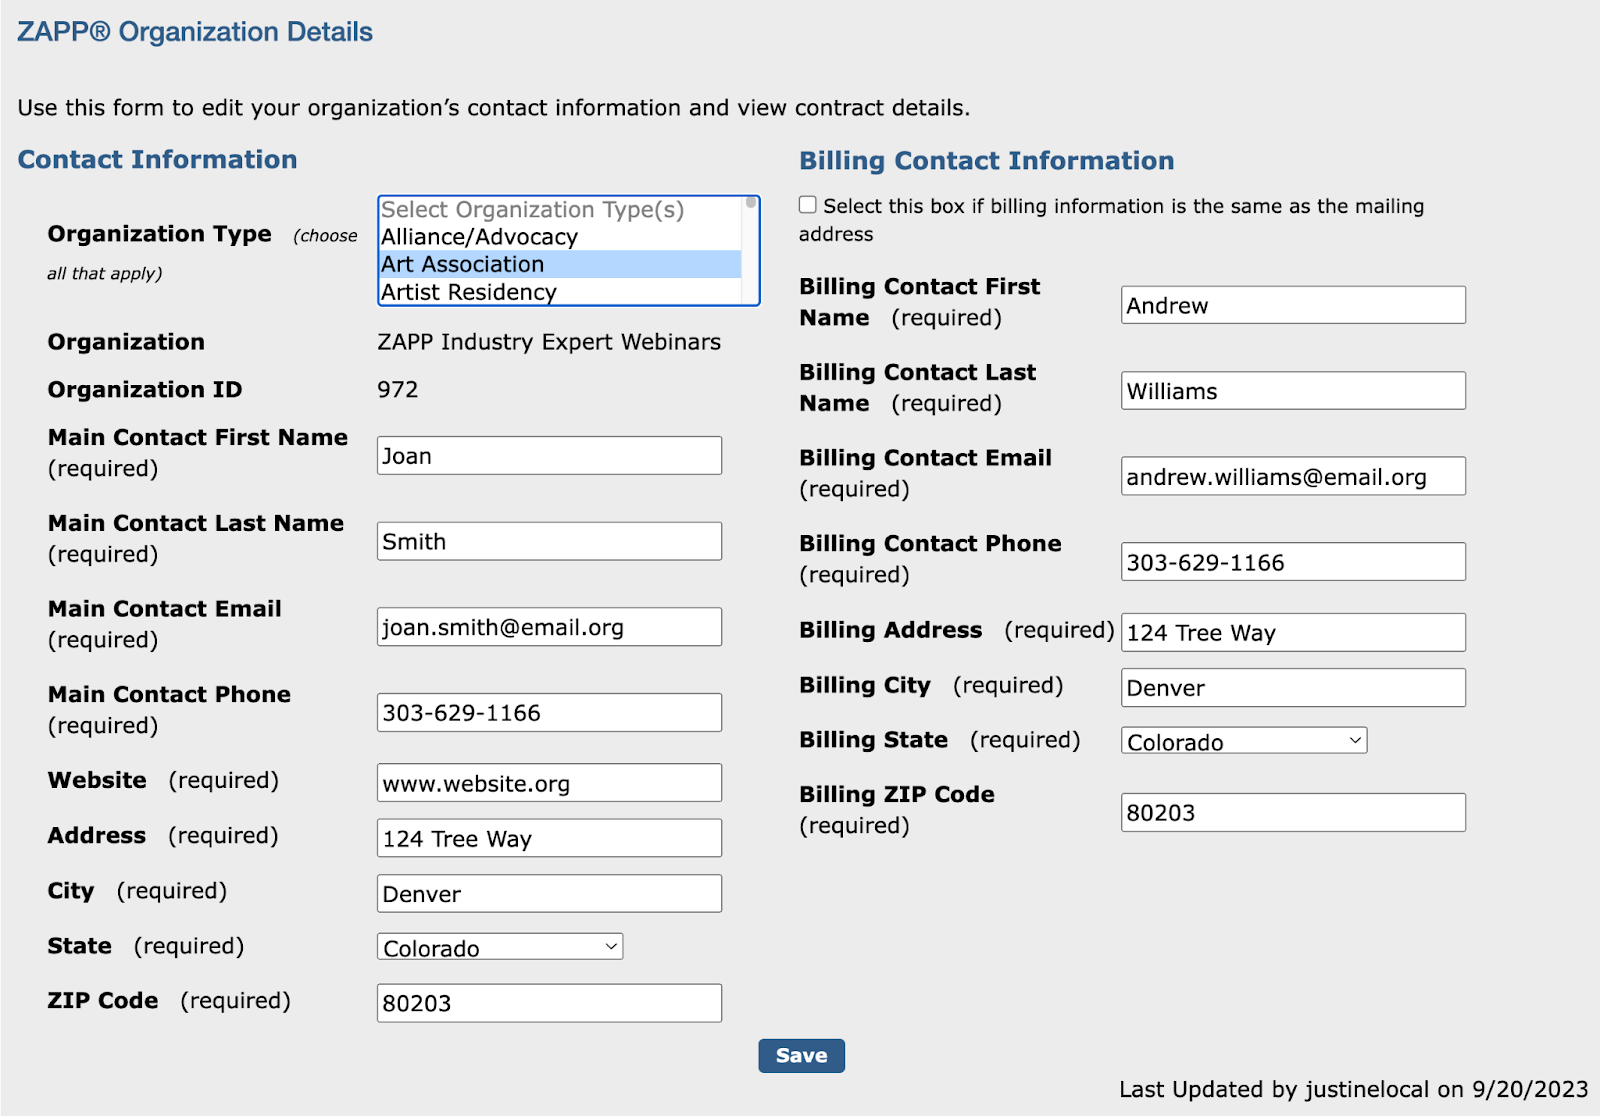
All of your organization’s account details are housed in the Organization Details page of the Account Manager’s profile. Note: General administrators do not have access to this page in ZAPP.
Updating the Contact & Billing Information:
- Log into your ZAPP account.
- Hover over the Profile tab of the menu.
- Click the Organization Details tab to access the account details.
- Locate the Contact Information and Billing Contact Information sections.
- Update the Main Contact as needed. The main contact is the person with whom the ZAPP team should discuss your account settings, event details, etc.
- Update the Billing Contact Information as needed. The billing contact is the person with whom the ZAPP team should discuss payment information, remittances, and balances due.. The billing address is the address used to send your monthly remittances if you receive those by check. The billing email is used to send remittance details.
- Click Save to finalize your changes.
Note: It’s important to keep your billing information up-to-date to ensure the revenue collected through ZAPP is properly remitted to you.
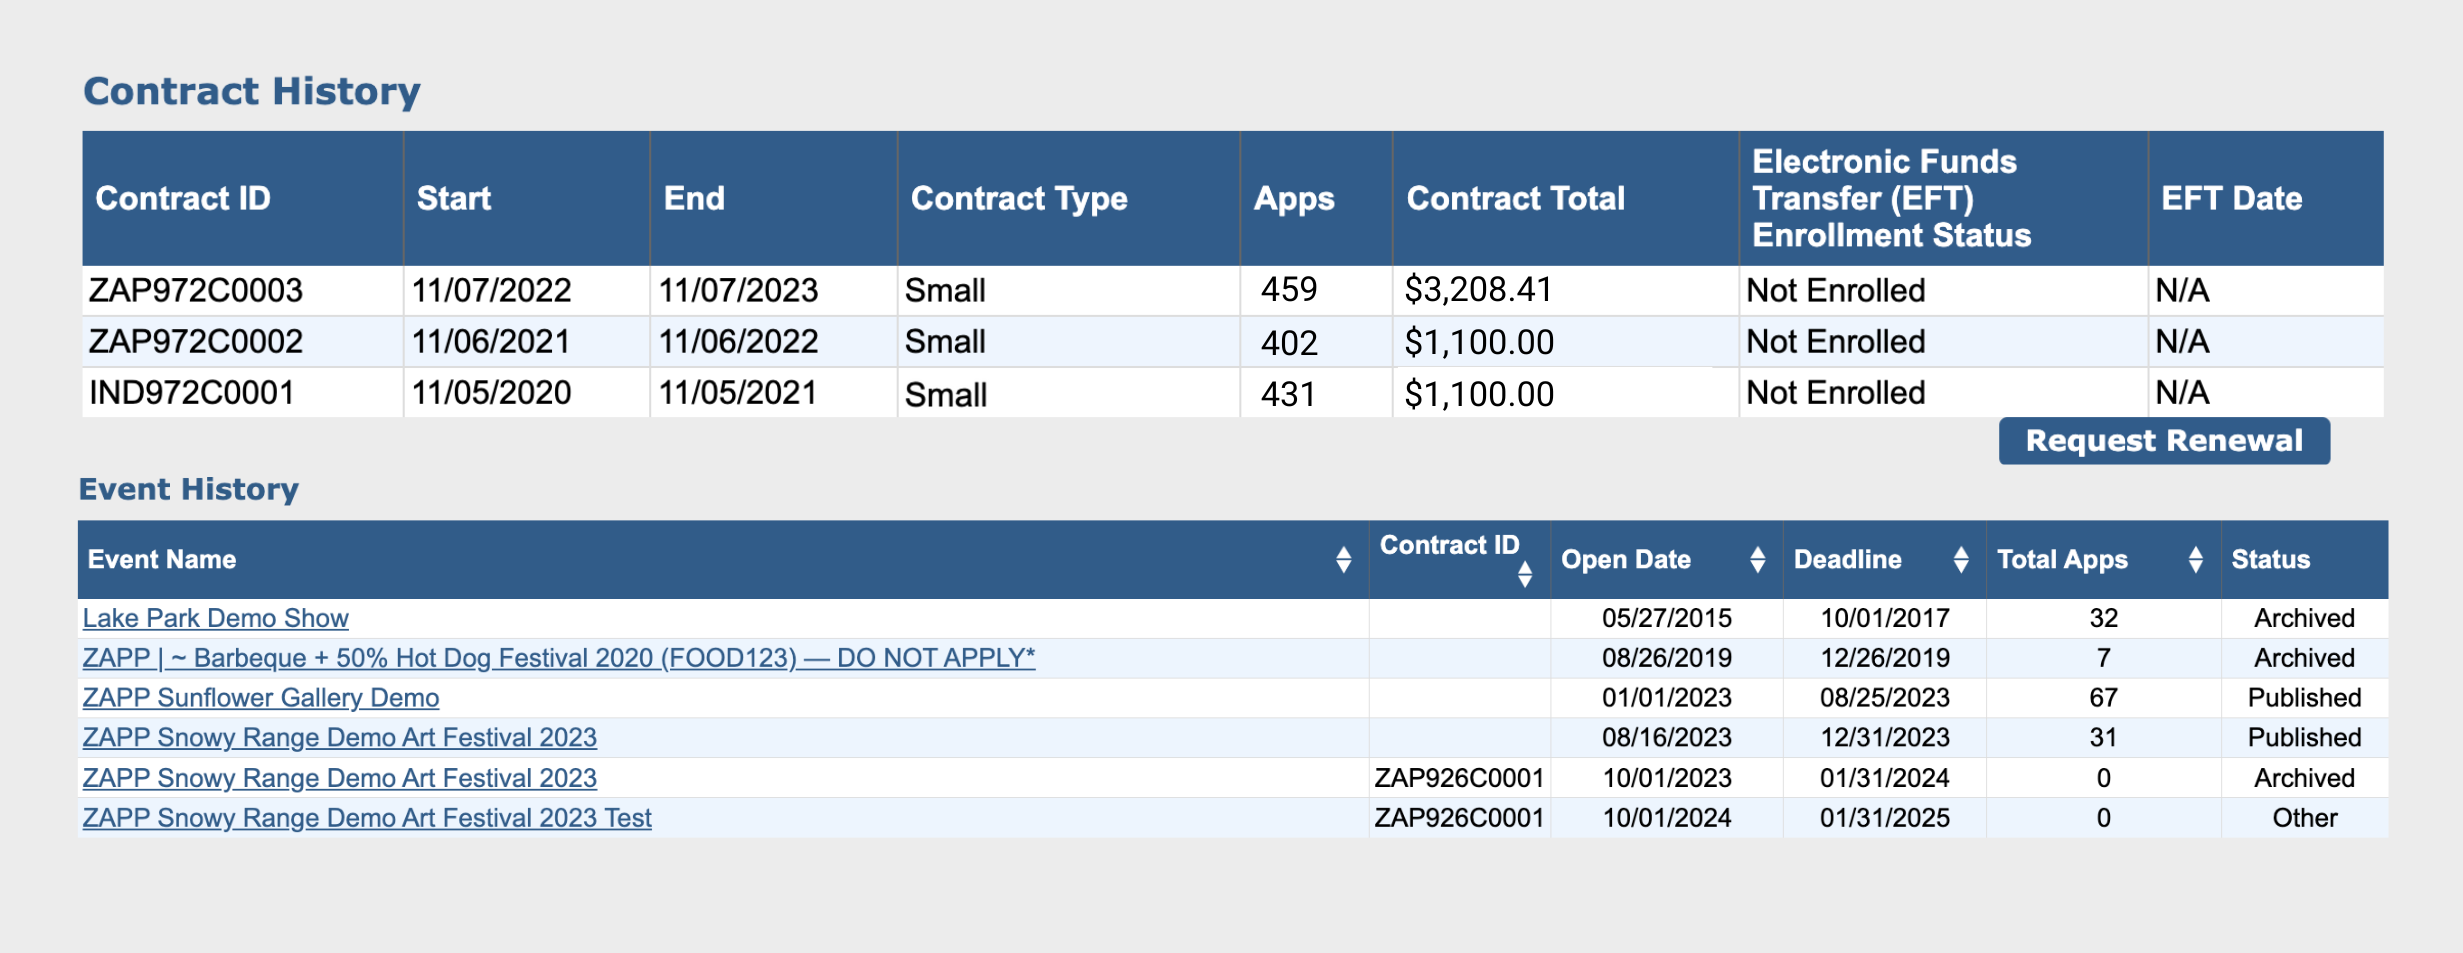
Viewing Contract & Event History:
- Log into your ZAPP account.
- Hover over the Profile tab of the menu.
- Click the Organization Details tab to access the account details.
- Scroll down to the Contract History section to view the list of contracts for your licensee, the dates effective, and the Electronic Funds Transfer (EFT) Enrollment Status.
- Click Request Renewal to notify the ZAPP team that you would like to renew your account.
- Scroll down to the Event History section to view the list of events for your organization.
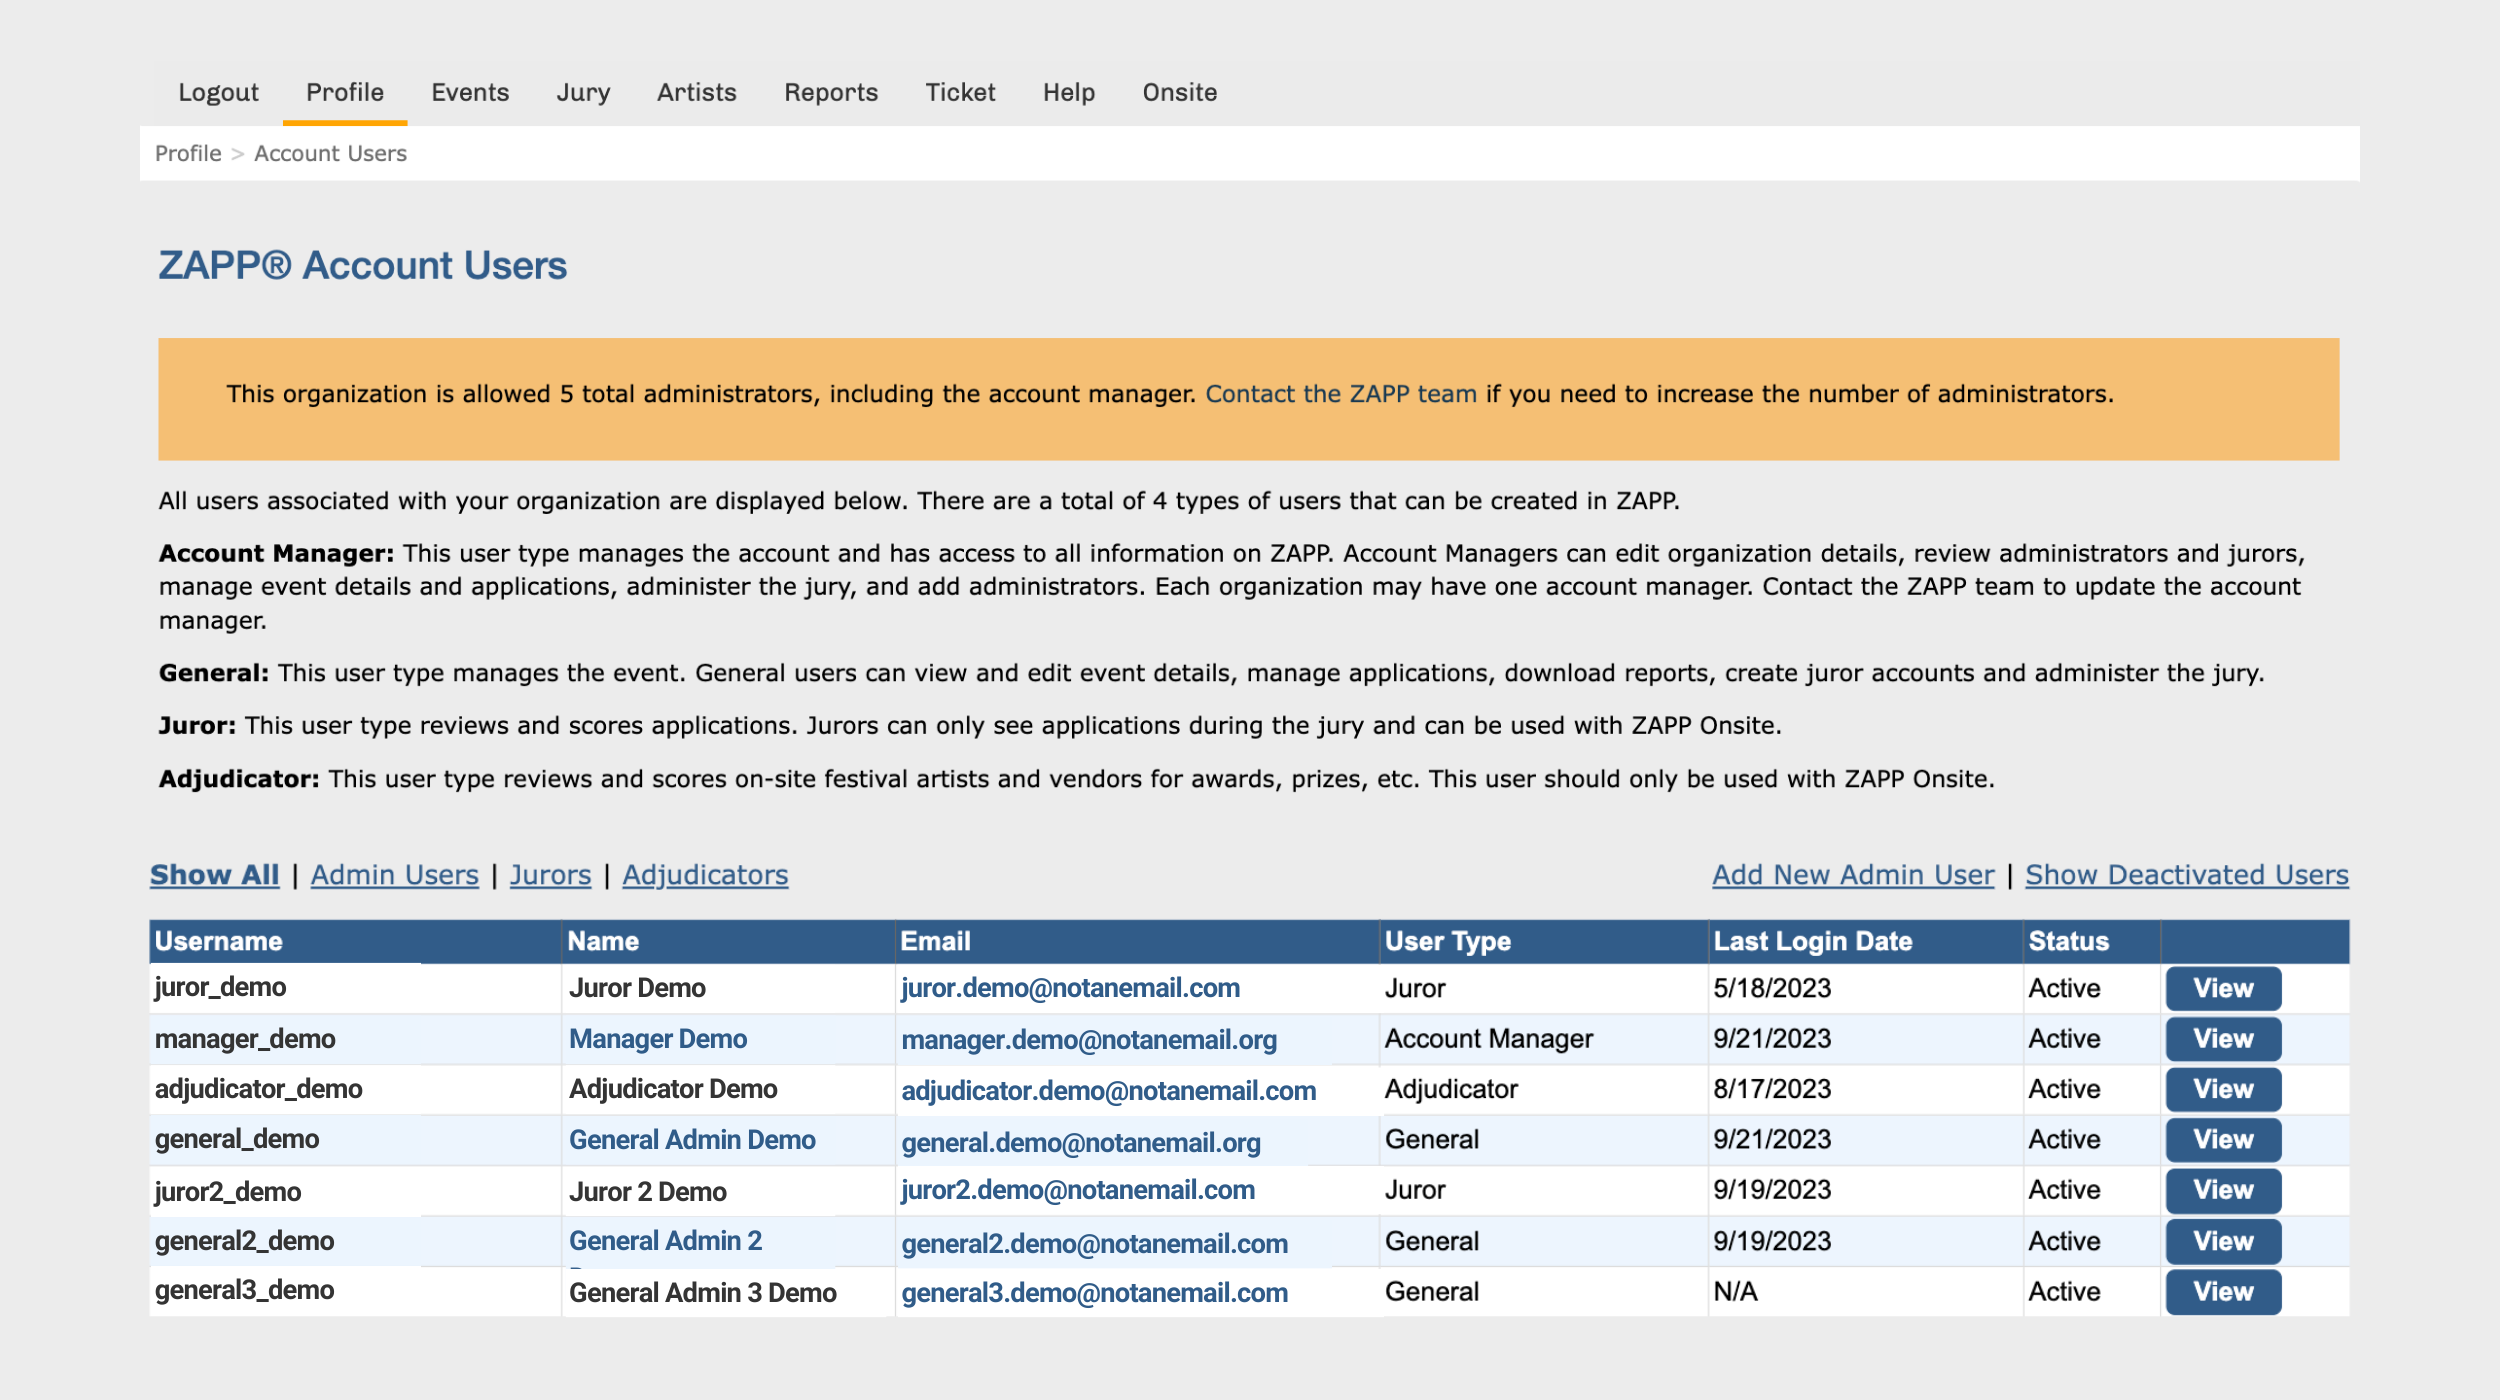
All administrators, jurors, and adjudicators associated with your organization are displayed in the Account Users page of the Account Manager’s profile.
Each organization is entitled to a maximum of five (5) administrator accounts.
- One (1) account is designated for the Account Manager.
- The Account Manager can edit organization details, view account users, manage event details and applications, download reports, and administer the jury.
- Contact the ZAPP team to update the account manager.
- Four (4) accounts are designated for General Administrators.
- General administrators can manage event details and applications, download reports, create juror accounts, and administer the jury.
Viewing the List of Account Users:
- Log into your ZAPP account.
- Hover over the Profile tab and click the Account Users tab.
- Click Admin Users to view the list of active administrator accounts.
- Click Add New Admin User to create a new administrator account.
- Click Show Deactivated Users to view the list of deactivated accounts.
- Click View for any account to view the username and administrator details.
- Click Jurors to view the list of active juror accounts.
- Click Add New Juror to create a new juror account.
- Click Show Deactivated Users to view the list of deactivated accounts.
- Click View for any account to view or edit the username and juror details.
- Click Adjudicators to view the list of active adjudicator accounts. Adjudicators are only used if you have the ZAPP® Onsite option enabled for your licensee.
- Click Add New Adjudicator to create a new juror account.
- Click Show Deactivated Users to view the list of deactivated accounts.
- Click View for any account to view or edit the username and adjudicator details.
How to Add a New Admin User:
- Log into your ZAPP account.
- Hover over the Profile tab and click Account Users.
- Click Add New Admin User.
- Enter the new administrator details.
- Note: Create a temporary password to create the admin account. Do not share this password by email.
- Click Add to save the new account.
- Share the username you created with the new administrator.
- Instruct the new administrator to set up a password by entering their email address and username under Forgot Password on the Admin Login Page.
- The system will send a link for them to set up a new password.
Note: A maximum of four (4) general administrators may be created per licensee. If you have more than four, you will need to deactivate a current administrator before creating a new one.
How to Deactivate an Admin User:
- Log into your ZAPP account.
- Hover over the Profile tab and click Account Users.
- Locate the account from the list and click View.
- Change the Status to Inactive.
- Click Save.
- All deactivated users accounts can be found by clicking on Show Deactivated Users from the Account Users page.
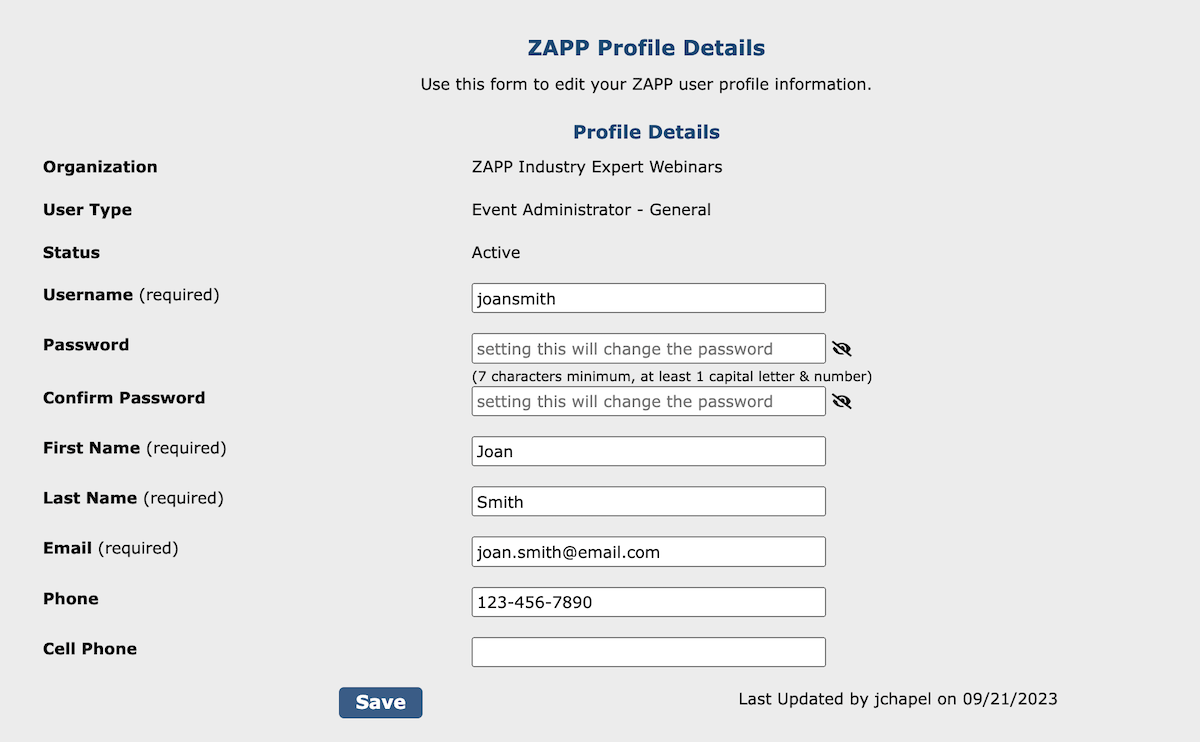
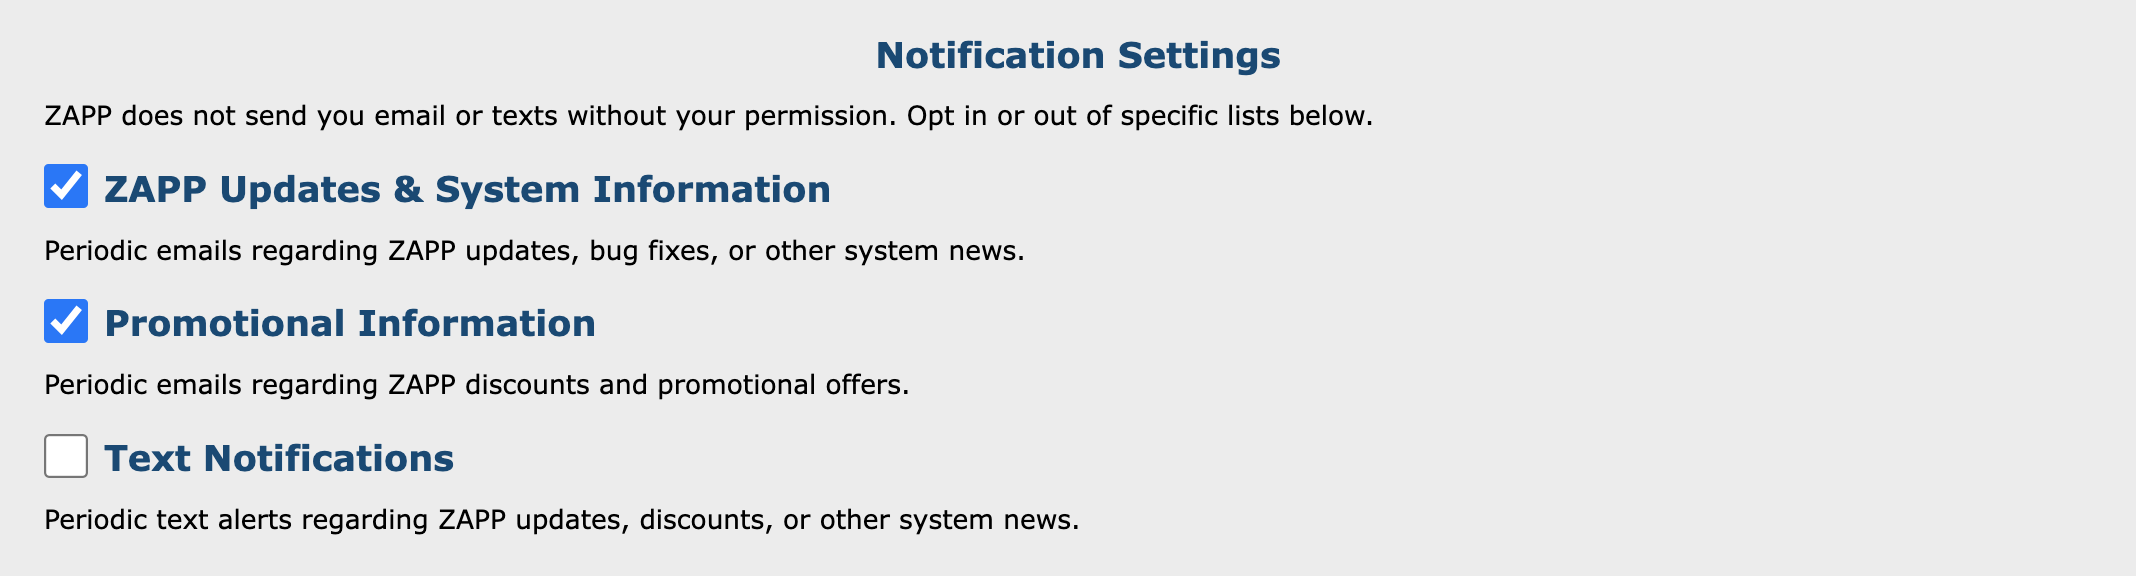
View and edit your contact details, login information, notification settings, and multi-factor authentication settings in the Profile Details page.
By setting up Multi-Factor Authentication (MFA), you add an extra layer of security to your ZAPP account. When MFA is enabled, you will log in by first entering your password and, when prompted, you will type a dynamically generated verification code provided by email or an authenticator app of your choice.
Important: If you are logging in for the first time, you must first choose your Multi-Factor Authentication (MFA) preference before you can access the ZAPP dashboard.
How to Log In Using Multi-Factor Authentication:
- Log in to admin.zapplication.org with your username and password and click Log In.
- When prompted, enter the MFA code that was sent to your email or authenticator app.
- Select Remember this device? if logging in from a trusted device (such as a computer or browser that only you use). You will be prompted to enter your MFA code on the same device every 90 days.
- Note: You can remember one ZAPP account (such as your administrator or juror account) per device. We suggest you select Remember this device? for the account you use more frequently.
- Select “Remember this device?” if logging in from a trusted device (such as a computer or browser that only you use). You will be prompted to enter your MFA code on the same device every 90 days.
- Click Submit.